
Shining a Light on Photography: A Beginner's Guide to Lighting
- Danny Pavey
- Jul 1
- 3 min read

Have you ever wondered how professional photographers manage to capture such incredible photos? Well, it's not just about the expensive camera or fancy lenses. It's about lighting! Lighting is the magic ingredient that makes all the difference between a mediocre picture and a masterpiece. So, let's explore why lighting is crucial, different lighting types, and how you can use them to create beautiful photographs.
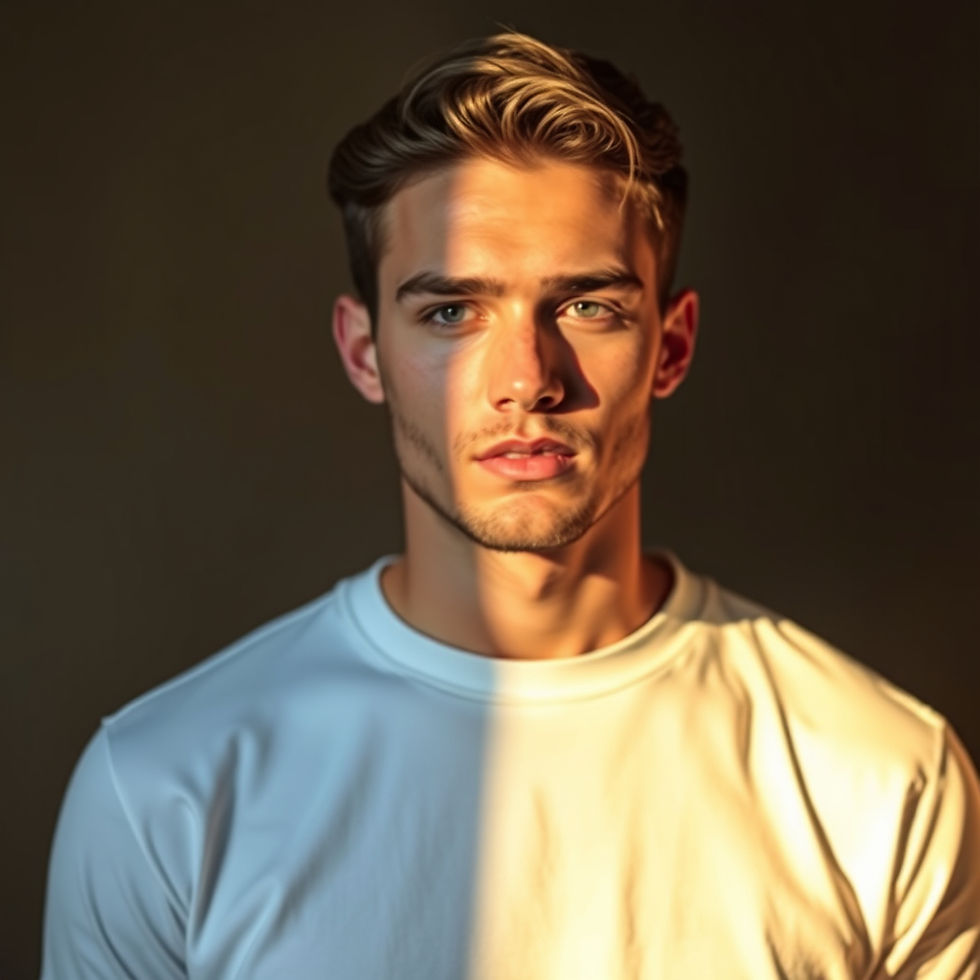
Golden hour portrait using hard, directional sunlight
Bending the Glow: A Practical Guide to Photography Lighting
When I strip away the expensive glass and the hours spent staring at editing software, my photography is fundamentally just an argument between light and shadow.
I figured out pretty early on that "good lighting" doesn't mean making sure you can see everything perfectly. A completely even, entirely illuminated face strips away the humanity. If I want to capture something real, something that feels sensual, heavy, or maybe even a little bit paranormal. You I have to shape the light to how you want it.
Here is the quick-and-easy breakdown of how I approach lighting, and how you can start using it to actually tell a story.
The Core Rules of Light
Hard Light (Direct): Think of the midday sun. It’s aggressive, travels in a straight line, and creates razor-sharp edges between bright white and pitch black. It’s unforgiving, but incredibly cinematic and bold if you use it on purpose.
Soft Light (Diffused): This is an overcast sky or light filtering through a sheer curtain. The rays scatter and wrap gently around your subject. It’s flattering, makes everything feel a bit more mythical, and is my absolute go-to for my own work.
Direction is Everything: Lighting dead-on from the front flattens everything and kills texture. Lighting from the side brings out the drama and the shape of the body. Backlighting (putting the light behind your subject) gives you striking silhouettes or a halo effect.

Big Love Festival, Sunshine Coast | Fairy face painting by Hannah Tess-Mann Keys | Using Natural Lighting
Practical Magic: Ideas to Try
You don't need a massive studio full of sterile gear to do this. You just have to know your tools and use what you have. Here are a few ideas to get you started:
Chase the Blue Hour: Just after the sun dips, the world gets a cool, blue colour cast. It’s isolating and eerie—perfect if you want to pull out the "spirits" in your shots.
Use a mirror: I've been playing a lot with mirrors and reflections lately. Catch a beam of hard sunlight with a handheld mirror and bounce it back into a dark room to create an intense, isolated spotlight on your subject's face.
Fake a diffused glow: Hang a cheap white bedsheet or a piece of coloured silk over a harsh window. It instantly transforms aggressive daylight into a soft, sensual wash of light.
Embrace the Golden Hour: Shoot just before sunset for a syrupy, nostalgic glow. It makes skin look incredible and gives everything a folk-tale vibe.
The single torch trick: Turn off all the lights in a room and use a single LED torch (or your phone light) from a sharp side angle. It carves out heavy shadows and highlights textures beautifully.
Forget the Rules, Just Shoot
At the end of the day, getting good at lighting is entirely about practice, experimentation, and actually having fun with it.
Go out, mess up, and shoot in terrible lighting on purpose just to see what happens. Start paying attention to how light acts in the real world. Also watch how the late afternoon sun makes a room feel nostalgic, or notice how a streetlamp looks reflecting off the pavement in the rain. Learn what the light does, break the rules whenever you feel like it, and just focus on telling the story you actually want to tell.
– Dan Charles

Comments